CANDLE ARCH
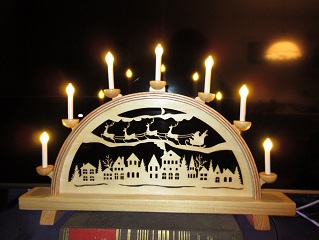
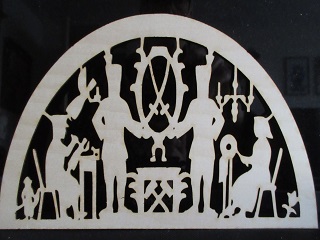
In Germany, the so called "schwibbogen" is a bowed piece of wood with candles on it. The candles are nowadays electric lights, I decided to use leds to make it even more modern. Inside of the arch there is a carved silhouette of a certain theme. These themes are very traditional. A popular theme is related to the minery in the region, mostly depicting mine workers and their attributes. Another theme is the "Seiffener Kirche", a very famous octagonal mountain church in the town of Seiffen.
THE MATERIALS
While I don't have a woodcarving workshop, I have to improvise with the materials. Plywood is the most obvious material to work with. The thin airplane plywood i can cut with the laser. Perfect to cut out the scenes. For the arch I use 3mm thick plywood that can easely be cut into strips. When we bow these strips and glue them together, they become rigid and remain bowed. I make them in such a way that i can hide wiring for the leds in them. The base is made out of a piece of pine wood that i buy in the hardware store. I select the best piece that has no knots and is straight. I carve slots in them to fit the arch in.
In Germany these workpieces are made from certified wood and the finish is almost perfect. It is very hard and time consuming to make them that perfect.
The ARCH
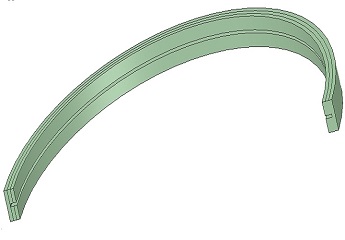
Since it is hard for me to bow a piece of wood, I make the arch out layers of plywood. I use 3mm thick soft plywood that is easy to cut with a stanley knive. The size is limited to the size of the silhouette, which is restricted by the properties of the laser. To make the arch we need a mold that has the desired size and is nicely circular shaped. I made the mold myself by using a baking pan with straight edge. Along the edge I clamped 2 strips of plywood with glue between them. I used many clamps so that it is glued together perfectly. I builded this mold layer for layer until it had the desired size. So now i can use it to form the erchs around.
The intended arch has a slot on the inside where the wiring is concealed and where the image fits in. To achieve this I glued 2 x 2 strips of 9mm wide together on the mold. So now I had two 9mm bows. These bows i glued to another strip of 20mm wide so that i have a slot of 2mm inside the arch.
THE CANDLES
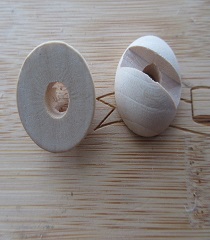
As mentioned, the lights look like thin candles. They consist of a half wooden bead, a 50mm long piece of plastic pipe and a support.
First the supports are made. These are made of 3 layers plywood glued together. The middle layer has a recess that forms the cahnnel to lead the wires trhough. The supports are all different, depending on their place on the bow.
In the arc slots are carved to fit the supports in. They are drilled through so that there is a hole in the bow. The wiring runs invisible through the slot in the inside of the arch and is led out through this hole. At the outside a weld is made with the wires of the LED.
The next part is a half wooden bead in which i drill a hole and carve a slot. We stitch the wires and LED through the bead and mount it on the support. For this i use a special mounting kit. When this is hardened I can fit the plascic pipe. Because the leds have wires i can adjust the height so that the LED sticks out exactly at the top of the pipe. The last stip is making a hat on the LED that suggests a candle flame. I printed them with opaque filament.
The silhouette
The scene inside the bow is carved out of a sheet of thin plywood. I do this with my laser. The images i steal from the internet. With software i can convert the photo's into a vector drawing that i can edit into the desired shape. It has to have the outline of half a circle that fits precisely into the slot in the arc.
The laser is capable of cutting very small details. If you consider the width of the cut is 0.3mm. So the vectordrawing has to be checked for details that are too small. If necessary we can make these details a little more robust so that they won't break off easely. Its also possible to add and remove parts of the drawing. If it contains p.e. a dear with very fragile antler, we can swab it for a reindeer with a more robust antlers.
ELECTRONICS
Since i had some ESP32 devlopment boards laying around, why not use them to supply power to the LED's. These boards are small enough to fit in a cutout in the foot of the arc. They have a 3.3V supply that is just enough to power the warmwhite 3mm LED's, even without a current limiting resistor. The LEDS can be sourced directly from the pins of the ESP but they are not very bright then. So I used a PNP transisitor to drive the LEDS. I developped software that has a webpage that allows us to do the configuration, setup timers, setup a default dim value, switch on/of manual and more. Or with speechcommands using my domotica system and google home.


