The Bill of Materials
There are only a few components involved. This hardware is realy simple and very cheap.
- 1 x Raspberry pi Zero W ~$10
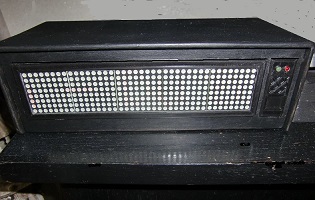
- 5 x 8x8 max7219 led matrix
- 1 x PCM5102 I2S DAC GY-PCM5102 ~$3,5
- an usb power unit (or a diy power supply)
- a BME280 sensor
- some small components
If you like to build a complete audio installation we need an amplifier/speakerset also. We can make the Raspberry switching the power on/off of the speakerset. For this we would need an opto-coupler and a triac. And a wall outlet to mount at the back of the housing.
schematic
The hardware:
Building it only means connecting wires between the components. And installing the software on an SDcard. So almost everybody could build this. Uh, for the led matrix this is not true, they have to be soldered together, this is fairly simple.
In my case i wanted to switch the power of the speakerset also. This means that i had to build a power supply board with a triac that can switch the main power. This is a technique i applied in some of my esp8266 projects. I soldered a board with a 5Volts DC power supply. There is a triac and an optocoupler that i connect to the gpio headers of the raspberry.
I build a case for the radio with a wall outlet on the back that is switched by the triac. So we just have to plug-in the powerplug of the speakerset.
The software:
I started with the installation of a simple linux version without a GUI. I connected this to my computer via the serial to usb converter. With putty i could open a terminal on the Raspberry. Now i could establish a wifi connection. I could proceed with installing ssh, samba and apache2 webserver.
The next thing was getting the sound system to work. The internet provides enough information on that.
The musicstreamer is mpg123. This program provides icy metadata so we can show the artist and songtitle on the display and on the webpage.
As for the rest is was a matter of building the html pages and scripts to get it all to work.
I had a very hard job to get the artist and song information on the webpage and lcd screen. At the moment it works by having a job running in the background that sleeps 10 secs before checking if there is new meta data available from the streamer. Probably not the best solution but for the moment it does the job.
The equalizer was also a puzzle because the alsamixer can not be controlled via the commandline. I discovered that the settings are keeped in a binary file. I could analize this file with 'hexedit' to see what values were changed when i moved the sliders in the gui of the alsa-equalizer. So i had to develop a script that edits the corresponding values in that binary file when the sliders in the webpage are changed. This works fine with just a bit of lag because the settings must be keeped. This is done by storing them in a textfile. When the webpage is loaded it uses these values to put the sliders back in their right positions.
Getting an AP to work was also not simple. But finally it works as it should. When there is no wifi connection, the Raspberry starts an accespoint. We can connect to it with a wifi equiped device and visit the webpage at 192.168.4.1. Here we can provide new wifi credentials and save them. The Raspberry reboots now and connects to the wifi. It shows the IP on the display. Very simple and do-able by a noob.
Working with the serverside scripts mean that the operation is not very reactive. Sometimes it can take a second or more to start or stop the radio. Therefor i developped a spinner that apears in the screen during runtime of the script.
