The materials
For a working powerplant you need:
- 2 x shelf supports
- 2 solar panels
- 1 two-channel inverter
- cables
-
Shelf supports:
Mounting the panels to the wall is not without risk, in heavy storms there are considerable forces working on the panels. You don't want to take the risk that they are blown away, causing damages or even injuries to people.
Moreover, theoretically snowfall of 50cm is possible. That would weigh 420kg on 1.7m2 according to my calculations.
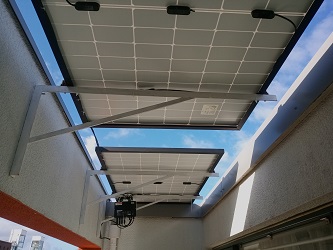
To make the installation as strong and save as possible, i decided to mount the panels horizontal level. This way they are surrounded by walls and the wind cannot get under them. This horizontal position has some disadvantages because the optimal position is at an angle of 35 degrees. The advantage is however that the wind cannot get much grip on the panels. Moreover there are almost no objects that can throw shadow on my panels, so they have sun all day. This would not be the case if they are mounted under an angle at the south. So i assumed that the disadvantage compared to an oblique arrangement can never be very big.
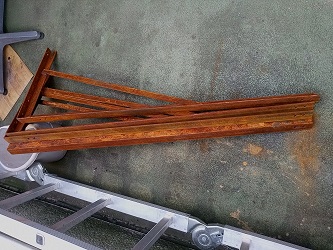
So my shelf supports had to be perpendicular. I designed the carrier and made drawings. A friend was kind enough to weld 4 pieces of them. Al lot of work was involved to made them corrosion resistant. first I had to remove the mill scale. For this purpose I had to let them rust first. By sprinkling them regularly with salt water and leave them outside, I was able to speed up this process which took several weeks. After that i used a rotating steel brush to remove most of the rust. With sanding paper and small steel brushes i removed the rust in the hard-to-reach spots.
When they where clean i painted them with hammerite. After 4 layers of paint they where finally white enough.
For questions you can mail to [email protected]
mounting
I have chosen 2 panels of each 370W. These panels are quit large, 1769 x 1052 x 35 mm.
The space above my balcony is just big enough to mount 2 panels with a space in between to place a ladder to get on the roof for maintenance. So 4 carriers are needed, placed under the panels in such a way that the weight and bending forces in the panel are evenly distributed.
The carriers have a relative short vertical leg so the pulling forces on the upper wall anchors are considerable. Therefor i decided to put 2 of those anchors in the upper part of the vertical leg. With enough mutual distance that the concrete will not be damaged by drilling 2 holes too nearby.
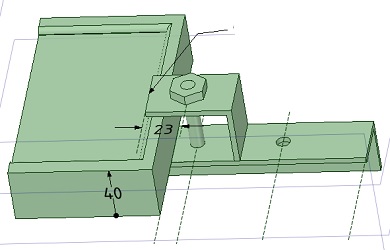
The panels are fixed on the carriers with a piece of aluminum corner profile with a bolt through it. This way the construction should be rigid enough to prevent the carries from swinging movements that could pull the wall anchors out. I printed molds to cast 8 blocks with a hole to place between the corner brackets and the panel edge. They will prevent the brackets from turning off the panels.
The inverter:
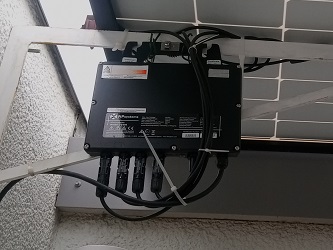
The inverter is of a type that can deliver max 600W. This means that the grid power cable can simply be plugged into a wall outlet. No extra adaptions are needed in the meterbox. Two pv units can be plugged into the inverter that can be mounted right under the panels.
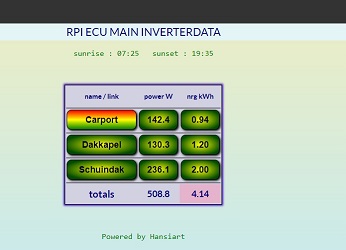
I already knew that for reading the data from the inverter, i could build a zigbee receiver. So i developped a device with an ESP8266 and zigbee module to read the data and display them on a website. In addition, the data is sent with mosquitto, so that external domotica programs or thingspeak can make use of this to make statistics and charts.
In the mean time this project has grown a lot with many people using it. There is a version with a raspberry zero that is a complete linux system with its own databases. It can make all kinds of statistics and charts of the yield of the solar installation.
Conclusion
It was quite a project, especially the development of the ECU took (and still does) a lot of time. But i am very happy with this small powerplant. It was relative cheap due to the diy installation. So far it yields almost 2,5kWh average each day. With the current electricity prices, it means I have recouped my investment within less than 2 years.
I am able to compare my yield with the yield of someone else who has the panels in an ideal position. Over the period july 1 to sept 22 my yield total was 242,7KWh and his yield was 246.0. This is only a small difference. I am curious how this would compare over a longer period.
My ESP- and RPI-ECU for monitoring the working and yield are working quite well and made a lot of people happy, all over the world where APS inverters are sold. It is a very cheap alternative for the APS ECU device that adds 200€ more to the cost price of the installation. For a small pv installation this is a large part of the total costs. My ECU device costs not more than 20€.
