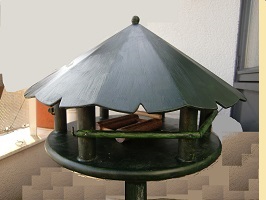
design
I started with 3d drawing the whole design so that i could judge the aesthetic aspects. This gives me a clear picture of the shape and dimensions of the roof parts. Now i could saw the segments out of the 4mm mdf. I finished the segments by making the sides very straight so that they fit precisely to eachother.
assembly
The next thing was putting them together. I did this with the help of a large round bowl that i used as a kind of mold. I attached the segments at the inside with painters tape and then made a temporary connection with hot glue. Next the seams where treated with epoxy and when this had been soaked in, the seams where filled with epoxy putty.
After hardening i sanded away the surplus of the putty and sanded the whole surface (outside and inside) of the roof so that it is open to soak with epoxy. Then i painted the surface with epoxy several times. The epoxy soakes into the surface, the more the better. Now the roof is completely soaked with epoxy, and after hardening this can be sanded and prepared for paint with acrylic UV paint. This should result in a very durable material, no water can soak into it.
For the bottom I sawed a round plane out of the 18mm mdf. I rounded the edges with a mill. In the plane i made 6 pockets of 10mm deep. I measured the slope of the roof and sawed the broomstick in 6 pieces, each has one side straight and the other sawed under the measured slope.
The pillars were straight up positioned in the pockets with some hot glue. Now i casted some epoxy in the pockets and after this was soaked in, i mixed epoxy with glassbubbles to get a thick putty which i used to fill the pockets and make a fillet around the pillars.
After harderning the fillets were sanded nicely round and the mdf and pillars also. Now they were treated with epoxy the same way as the roof.
To put the roof and the bottom together i 3d-printed 6 molds. I used these to cast a connection between the pillars and the roof. The pictures show how this is done.
the pole
The inside of one end of the steel pipe was cleaned, sanded an treated with soldering grease and then flattened and soldered. Then the edge was sharped so it will easely go into the ground. The pipe is carefully painted and the part that goes into the ground was wrapped with packing tape. The objective is that during the penetration into the ground the paint will not be damaged.
To make a stable connection with the pole I wanted to have a flange under the bottom with bolts to fix the house to the pole. The easyest way seems to cast one so i printed a mold in which i could position the bolts and the pole, and then cast it.
For questions you can mail to
[email protected]
